Everyone knows how to use the basics when it comes to PowerPoint – learning a few advanced tricks can help ensure that your next presentation stands out.
Many of us probably started using PowerPoint well before our first jobs, for school or college presentations. We learned the basics and fiddled with finding the best background. Professional presentations should go a step further – for example, by using Action Buttons.
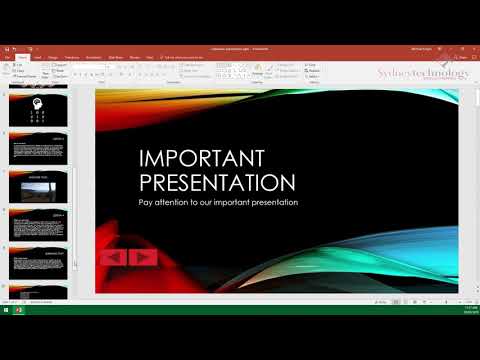
Action Buttons can perform a number of tasks, such as moving forward or back within the presentation. To get started, you first need to input icons that can serve as the Action Button. Under Insert, and Shapes, you’ll find a sub-menu of Action Button icons that you can place on your slides. After dragging and placing the icon where you want it to be on your slide, PowerPoint will automatically open a small menu to let you choose what the button will do – in this case, you’d select “Link to the next slide”, a default option.
There are many other actions an Action Button can perform, not to mention that you can make nearly anything into an Action Button (similar to hyperlinking a portion of text in Microsoft Word). After selecting the icon you want and placing it on the slide, simply right click and select “Hyperlink” to set its action.
Action Buttons can be configured to:
- Link to a specific slide
- Run a program
- Run a macro
- Play a video or audio clip
- And much more!
Give Action Buttons a try and see how they add a little more ease to the navigation and flow of your next presentation. However, if you’re curious about even more tips for using Microsoft PowerPoint, give these a try:
Use the Ruler and Gridlines
Aligning your text boxes so they are symmetrical creates clear, attractive presentations. Doing this is easy with gridlines and the rule turned on. To do this, just right-click outside of the slide, hover over ‘Grid and Guides’, then click ‘Gridlines.’ For the ruler, right-click outside of the slide, then click ‘Ruler.’
Use Presenter View for More Dynamic Presentations
Presenter view can help you be more prepared and make your presentation more effective. It uses two displays, one being the standard slideshow audiences usually see while the other is just for the presenter. The presenter’s display allows you to easily see the notes on your current slide and the upcoming slide.
The presenter’s display also contains features that can help direct the audience’s attention to certain areas of the slide and make your presentations more engaging:
Point or annotate with the pen icon: Clicking the pen icon gives you the option of using a laser pointer, pen, or highlighter. To erase, click the pen icon again and choose “Eraser” or “Erase all ink on slide”.
Black the screen with monitor icon: If your audience’s eyes should be on you, not the PowerPoint, hit the icon that looks like a monitor with a slash through it. To show the screen again, just hit the icon again. Alternatively, you can hit ‘B’ or ‘W’ to blackout/whiteout the slides, then press any key to return to the presentation.
Add Audio To Your Presentation
Adding a soundtrack to your presentation is easy, and can add some ambiance. Audio can be added to individual slides or accompany the entire slideshow. To add audio:
- Go to the ‘Insert’ tab, then on the far right will be a button that says ‘Media’.
- Click the ‘Media’ button, then ‘Audio’, then ‘Audio on my PC’
- Select the audio file. To have the audio accompany the entire slideshow, click ‘Play in Background.’
Combine Shapes
Even if you don’t have Adobe Photoshop, PowerPoint will allow you to merge shapes that can add some pizzazz to slides. To do this:
- Go to the ‘Insert’ tab and click on ‘Shapes.’ Draw the shapes you want to combine.
- Select all of the shapes you are combining by holding down Ctrl and clicking.
- With the shapes selected, go to the ‘Format’ tab and click the ‘Merge Shapes’ button. This button is small and on the left of the ribbon. It looks like a tilted Venn diagram.
- Choose the type of combination you want and click it.
Recover Unsaved Presentations
Realizing you just closed an unsaved presentation can be pretty terrible. No one wants to re-do something that’s already been finished. PowerPoint can recover unsaved presentations so all may not be lost.
- Click ‘File’ then ‘Open’
- On the right is a list of all recent presentations, scroll down to the very bottom
- At the very bottom of the list should be a ‘Recover Unsaved Presentations’ button
Customize Your Quick Access Toolbar
If there’s a command you use a lot in PowerPoint and want easily at your fingertips, add it to the Quick Access Toolbar. By default, it has ‘Save,’ ‘Undo,’ ‘Repeat,’ and ‘Start From the Beginning.’ Just click the drop-down arrow to the right of the ‘Start from the Beginning’ (if you currently have the default Quick Access Toolbar). Scroll down and click on ‘More Commands’ to see an exhaustive list of commands that can be added. Select your desired commands and then click ‘Add.’ Now, you can easily click them from the top of the PowerPoint window anytime.
For more Tuesday Tech Tips, and for expert IT support to help keep your business safe, get in touch with Sydney Technology Solutions at (02) 8212 4722 or [email protected].